Ah Marketing Cloud, such a love hate relationship we have.
If you’ve worked with Marketing Cloud long enough, you may have become frustrated with the lack of logging details presented back in the user interface. From automation to email errors, and journey activities, the details logged and presented are either quite minimal, downright confusing or simply non-existent.
Have you ever thought, wow I’d love to be able to track more details about what activities are firing off in my journeys? Well, although not a huge leap forward, and still has it’s share of limitations, in this post I will show you a very simple way to use the old tried and true Update Contact activity in Journey Builder (not to be confused with the Sales Cloud Update Contact activity) to help you log and track your journeys and contacts in your journeys. Using the Update Contact activity we can write data to a data extension of our choosing.
Step 1 – Create a ‘Logging’ Data Extension
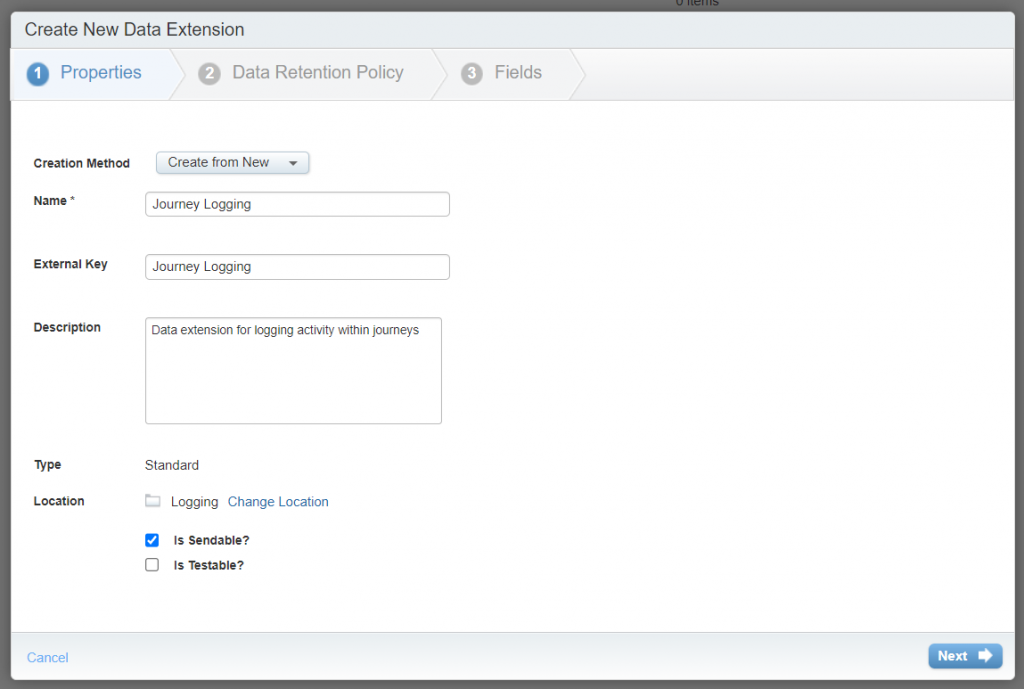
First we’ll create a new standard data extension that we will be ‘logging’ data to from within our journey. Let’s call this Journey Logging for now, in these screens I am creating this via Email Studio > Email > Data Extensions.
Before we get too carried away here however, we need to talk about some important requirements and limitations for the Update Contact activity we’ll be using in journey builder to update this new data extension.


First, this activity can only update a sendable data extension linked to subscriber key for the Send Relationship. More importantly this will only match rows to the subscriber key for the contact in the running journey at the time of processing the Update Contact activity.
Important! Due to this second limitation, this means if you are updating a data extension where the subscriber key exists for more than one row, all rows are updated. This has the potential for data loss or corruption if setup incorrectly. This leads us to the conclusion that this activity should only be used where you’re okay for multiple rows to be updated for each contact, or more ideally used where the relevant subscriber key field is the primary key for the data extension – meaning only one row can exist per unique subscriber key (contact).
“Ah, but I can outsmart this limitation with a composite key setup, right?”
Errrr, no. Unfortunately while it is still possible for the Update Contact activity to work with data extensions that have a composite key setup which includes the subscriber key, essentially this activity does not respect nor use the primary key setup for the data extension, this will simply match on the Send Relationship field setup for the data extension (subscriber key) when performing an update.More information about this can be found here: https://help.salesforce.com/s/articleView?id=000382018&type=1

Now, back to creating our new data extension…

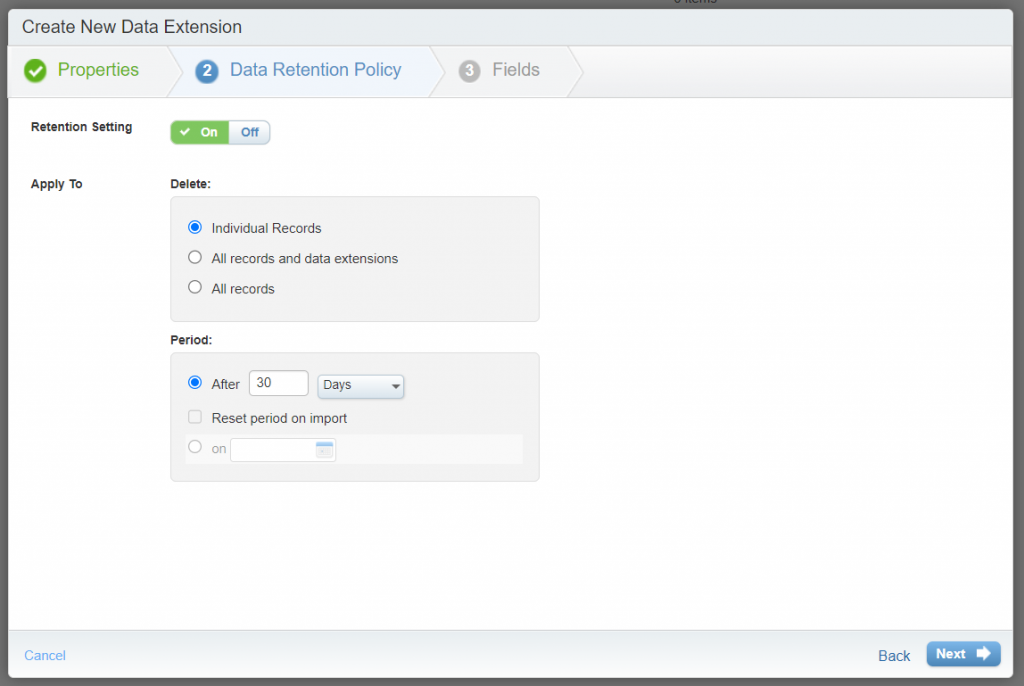
If you are logging a lot of activity to your data extension, it can gain quite a lot of rows quite quickly, so while you don’t need to do this immediately, you may wish to add a Data Retention Policy to your logging DE. This is a good way to have old redundant data automatically removed after a set amount of time.

For simplicity I am only going to add three fields to this new DE:
| Field Name | Field Type |
| Subscriber Key | Text (adjust this type for your Subscriber Key setup) |
| Log Date | Date (no default) |
| Currently On Journey | Boolean |
With date fields like Log Date we can set this to default to “current date”, so when any row is added it stamps this with the current date by default, but for demonstration purposes we won’t do this here, we’ll stamp this date in our Update Contact activity within the journey.
Step 2 – Logging data from within our journey
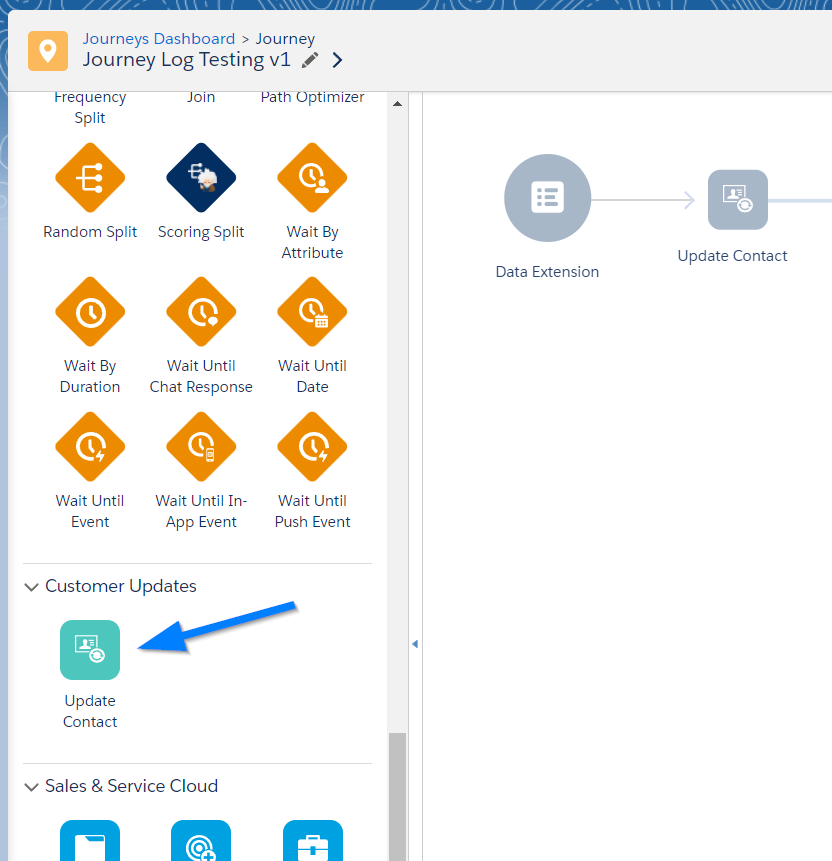
In our journey we can now drag in the Update Contact activity where ever needed and configure. You can add as many of these activities through the journey as needed.

When setting up the activity, we’ll first select the new data extension we created, before editing the attribute values. Note another important limitation for this activity is that you can only set static values here, there is no way to drag and drop to include data dynamically for writing to the DE, such as journey data (e.g., fields in the data extension used as the entry source).
Now I will however add to this, that it is possible to use journey data dynamically as values within an Update Contact activity, however this requires you to perform a little hacking and retrieve backend references to the entry source fields, such as the below, which references the Email field from a data extension entry source for the journey.
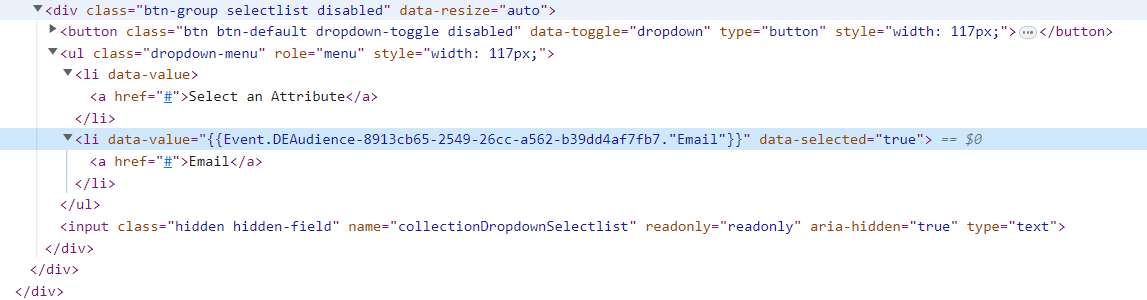
{{Event.DEAudience-8913cb65-2549-26cc-a562-b39dd4af7fb7."Email"}}The following example uses Chrome on Windows, but should be a similar process in Firefox or other browsers and disclaimer, while this currently works it may not work in future.
To retrieve a reference to a journey data field like this, go to the journey settings, right click the drop-down menu for the Use email attribute from Entry Source selection, and select Inspect, Inspect Element or similar.
In the HTML code shown for the inspected element, expand the parent DIV, then the UL (dropdown-menu) element and then under this the LI elements until you see reference id’s to the different email fields in the entry source.
You can copy this reference value, including opening and closing curly brackets {{ }}. The field name from the entry source data extension is the last within this reference, so in our example above this field name is Email. We can then replace this name with any other field name from our journey entry DE and add the reference into the Update Contact activity to pull in this value for use. For example, if we have another field named FirstName we could adjust the reference above to be:
{{Event.DEAudience-8913cb65-2549-26cc-a562-b39dd4af7fb7."FirstName"}}


I digress… back to the Update Contact activity in our journey.

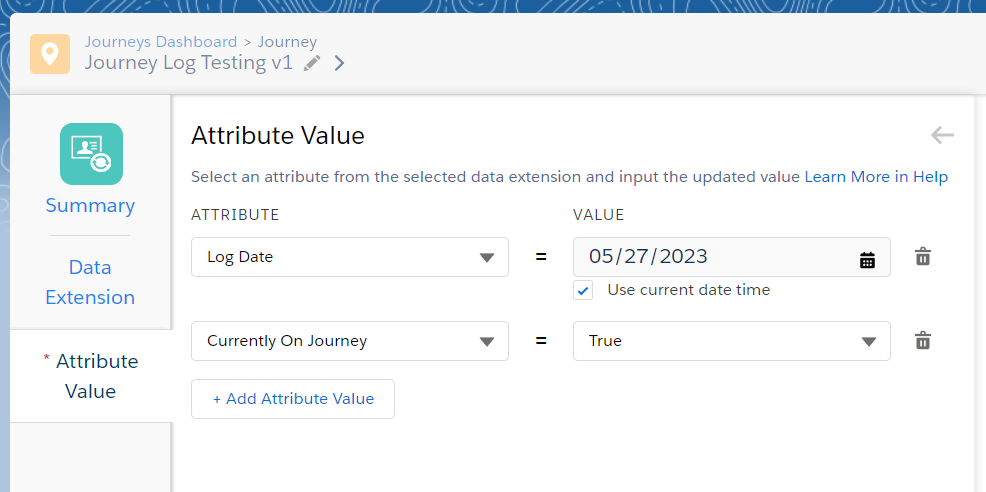
Now at the end of the journey we can add another similar Update Contact activity to set Currently On Journey to false. There are several use cases and possibilities for this type of logging. Another example may be having other fields setup to log which emails have been sent, or to log specific journeys the contact is on, or has been on.
The real power of this setup comes into play when you link your logging data extension in Contact Builder, allowing you to reference the log data in journey decisions! Let’s do it!


Step 3 – Let’s hook up
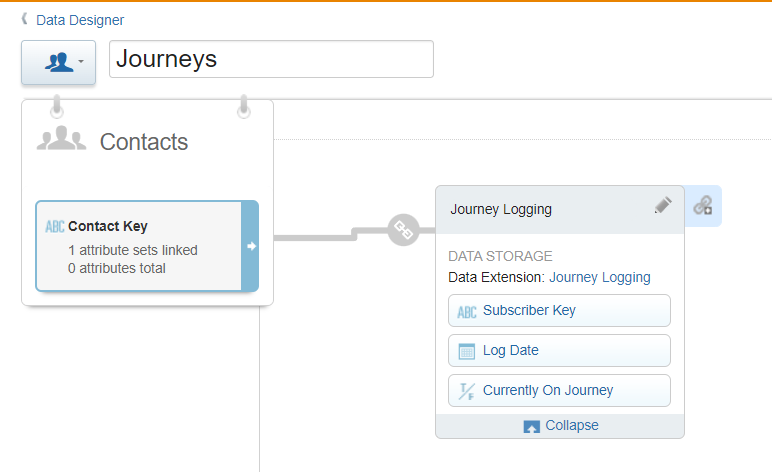
In Contact Builder > Data Designer we’ll create a new attribute group called “Journeys” and then inside this link up our new data extension. For those unfamiliar with how Contact Builder attribute groups and data extension linking works, it is simply a way to link related data to contacts so that this data can be referenced across multiple channels – e.g., email, SMS, push etc., most commonly in journeys. A good example might be sales order data which has a reference to the contact via a contact key field containing values that match the selected contact id in Marketing Cloud. Care should be taken however when adjusting the Contact Builder data model, as this can cause issues with running journeys and their decision splits and goals if setup incorrectly.


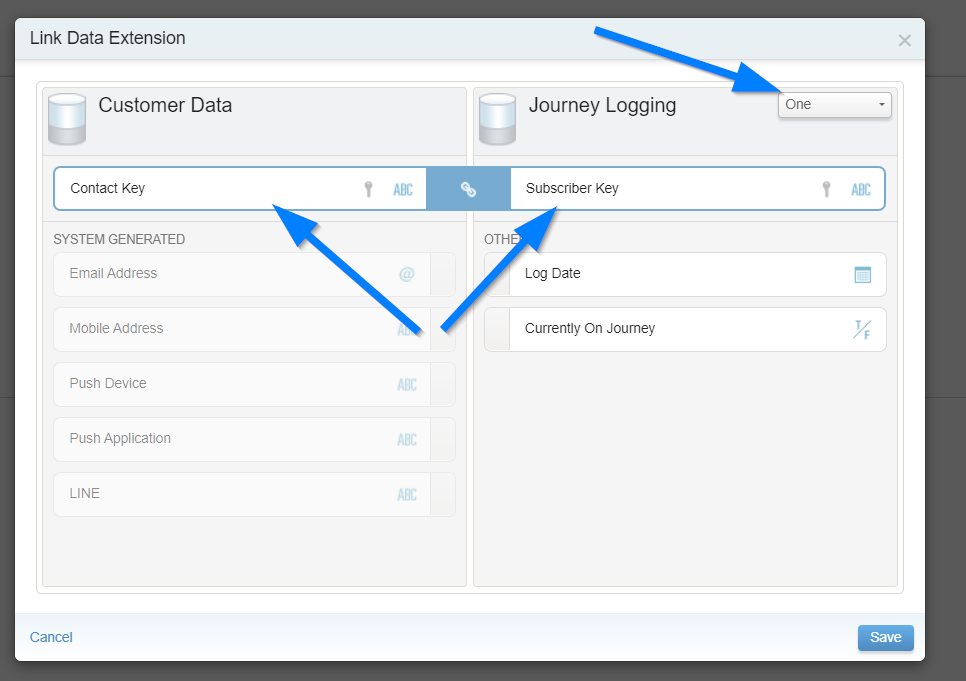
Now after clicking into our new attribute group, link the new data extension to contact (customer data). For this data extension we’ll be linking the Customer Data > Contact Key to Subscriber Key in a one-to-one relationship (only one contact with the matching key can relate to one record in the linked data extension with a matching Subscriber Key). If the linked data extension was setup in a way to allow multiple rows for the same contact/subscriber, we would instead set this cardinality to one-to-many.


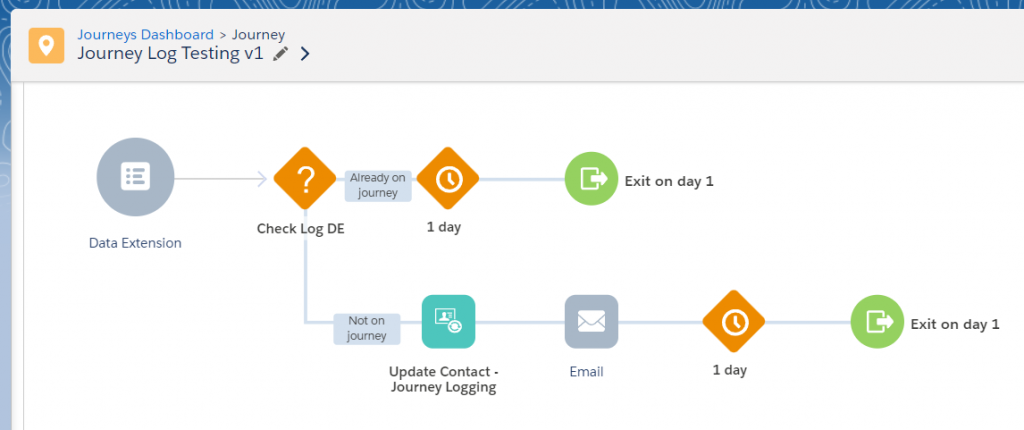
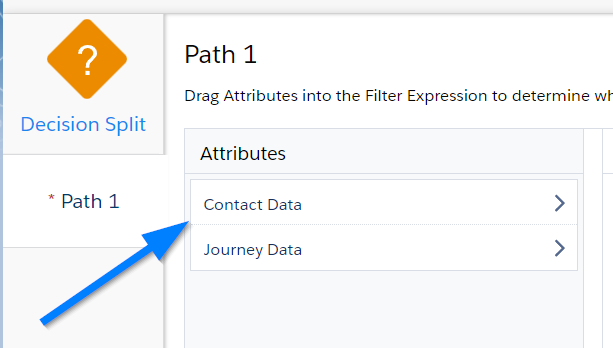
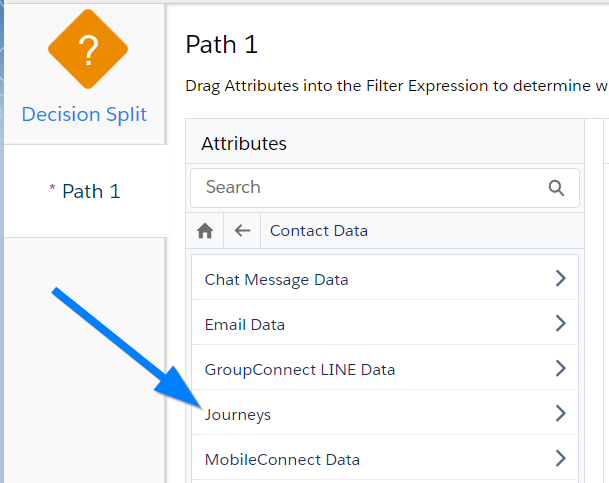
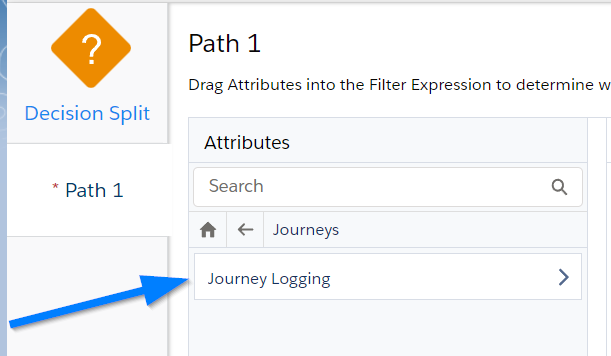
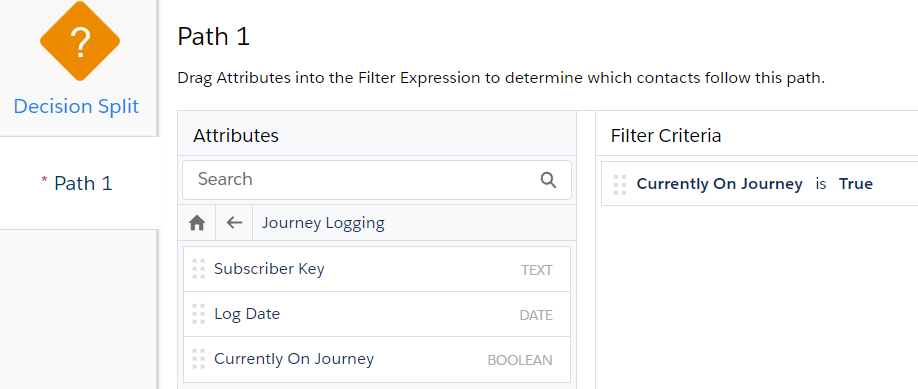
Once our data extension is linked in Contact Builder we can now reference this in decision activities within our journeys. When adding in a decision split we can now do this via Contact Data > Journeys (our new attribute group) > Journey Logging (the DE we linked). This allows us to now compare the values found for this contact’s row of data in the logging data extension. For example, we could now check if Currently On Journey = true and if so, send the contact down a different path in our journey.


And there we have it, our example journey is now complete!